If own an Oura Ring, you know that it’s a great wearable for tracking your sleep, activity, and readiness. But what happens when your ring runs out of battery? Worry not! Oura Ring charging is easy with just a few simple steps.
In this post, I’ll guide you through the entire process of charging your Oura Ring so you can get back to reaping its benefits as soon as possible.
NB:
- Letting your Oura Ring’s battery completely drain before charging it can shorten its overall lifespan. Therefore, it’s recommended to charge your ring before it reaches a critically low battery level.
- Always keep the ring’s battery level above 30%.
Table of Contents
Understanding Your Oura Ring’s Battery Life
Before we dive into Oura Ring charging, it’s important to understand its battery life. The lifespan of the Oura Ring battery can vary depending on how often it’s used and how it’s charged.
Understanding your Oura Ring’s battery life is essential to ensure that it’s always ready to track your activity and sleep.
By following the tips mentioned below, you can prolong the lifespan of your ring’s battery and avoid any unexpected interruptions to your tracking.
Oura Ring Battery Life Expectancy
The Oura Ring’s battery should last up to seven days with regular usage before it needs to be recharged. However, this battery life can vary depending on the frequency of use, age of the ring, charging practices, and the features enabled on the device.
For example, if you use the ring for sleep tracking, which requires continuous monitoring, the battery may drain faster than if you only use it for activity tracking.
Signs of Low Battery on Oura Ring
If your Oura Ring is running low on battery, it will alert you with a notification on your paired device.
It’s important to charge your ring as soon as you receive this notification to avoid it running out of battery during the day or night.
To enable low battery notification:
- Open the Oura App on your smartphone
- Tap on ‘Menu’ (in the upper left-hand corner of the ‘Home’ icon tab)
- Tap ‘Settings’ then ‘Notifications’
- Enable ‘Battery Level’ notifications
NB*: You won’t receive notifications if your ring is in Airplane mode.*
How to Check Battery Level on Oura Ring
If you’re unsure of your Oura Ring’s current battery status, you can check it on the Oura app. Simply open the Oura app and tap the battery icon (in the upper right-hand corner of the Home tab).
It’s a good idea to check your battery level before going to bed. You don’t want to wake up with a ring with low battery and you have a long day ahead.
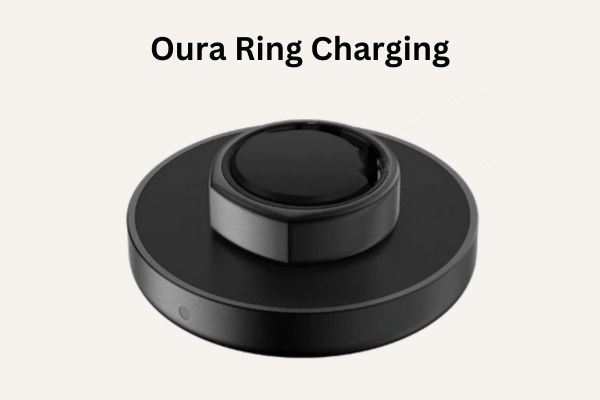
Oura Ring Charging: Step-by-Step Instructions
To keep the sleep-tracking ring functioning at its best, it’s important to keep it charged.
Here are step-by-step instructions on how to charge your Oura Ring.
- NB: Even though Gen2 and Gen3 chargers are compatible with both Gen2 and Gen3 Oura rings, the Gen3 Oura Ring charger includes a red-green-blue (RGB) LED to help communicate its charging status to you. In this section, we’ll focus on charging the Gen3 Oura ring.*
Step 1: Connect the Charger to a Power Source
Before you can charge your Oura Ring, you’ll need to connect the charging dock to a power source. You can use a wall adapter or a USB port on your computer. Make sure the charger is plugged in securely and the power source is turned on.
The LED will turn to solid white which turns off after a few seconds. (This indicates that Oura Ring charger is connected to a power source but there is no ring to charge).
Step 2: Align the Oura Ring with the Charger
Once the charging dock is connected to a power source, it’s time to charge your Oura Ring. Place the ring on the dock and charging starts.
The RGB LED will start to slowly blink white.
Step 3: Wait
The Oura ring will take 20 to 80 minutes to fully charge. It’s important to note that the charging time for the Oura Ring varies depending on the battery level.
The RGB LED will still be pulsing white slowly.
Step 4: Remove the Oura Ring from the Charger
Once your Oura Ring is fully charged, it’s time to remove it from the dock. Simply lift the ring off the dock and it will disconnect automatically.
When fully charged, the LED will turn solid green.
You’ll also receive a push notification from your Oura App when charging is complete.
Troubleshooting Charging Issues
Sometimes, even with the proper steps, charging issues can occur. Here are some common problems you may encounter and how to resolve them.
NB*: These troubleshooting tips are for the Gen3 Oura Ring since its charger comes with an RGB LED that communicates the charging status.*
LED not lighting up
If you have connected the charger to a power source but the LED is not lighting up;
- check if the charger’s cable is properly connected,
- check if the ring is properly positioned on the charging dock,
- check if there is good contact between the charging dock and the ring,
- try a different USB-C cable,
- turn the charging cable 180 degrees and reinsert it in the charger,
- try a different power source.
NB*: If everything is working perfectly, the LED on the charger should be pulsing white slowly.*
Solid White LED which turns off after a few seconds
This is usually not a problem; it shows that the charging dock is working perfectly but a ring is not placed on the dock for charging. Or a ring has not been placed properly.
Just place your ring on the dock and charging will start. If your ring is on the dock already, try adjusting its position to ensure you have placed it correctly on the dock.
LED blinking blue
A blinking blue light indicates that your ring is not currently paired to a device and is ready to connect to Bluetooth.
You’re either setting up your ring for the first time or you’ve performed a factory reset on your ring and did not pair it to your device afterward.
All you need to do is pair your ring to a smartphone and you’re set. After pairing, the LED will turn to solid blue and then fade to white.
LED blinking red
A blinking red light is an indication of a faulty ring or charger. Try the following;
- take the Oura ring on and off the charging dock a few times to see if the light changes to flashing white,
- make sure you have the latest firmware installed on your ring. Check the Oura Ring app if there is a firmware update available,
- as a last resort, perform a factory reset of your ring.
If none of these solutions work, contact Oura support for further assistance.
How long for Oura Ring to charge
The Oura Ring (Gen 3) takes between 20 to 80 minutes to charge fully, depending on the starting battery level. The capacity of the built-in rechargeable lithium polymer battery is between 15 to 22 mAh based on the ring size. It’s important to charge your ring before going to bed and to make sure it’s charged to at least 30%.
When the LED turns green, your ring is fully charged. You’ll receive a push notification from your Oura App when charging is complete. The charging dock will fade from blue to white once the ring is paired. During subsequent charges, the dock’s LED indicator will pulse white.
Oura Ring not charging
If your Oura Ring is not charging, there could be several reasons for it. Here are some tips and solutions to help you troubleshoot the issue:
- Ensure that your ring is resting properly on the size-specific dock. If it is, a small light will appear on the front of the charger.
- Check if the USB cable is connected properly to the dock or the adapter. If it is loose, unplug the USB cable, turn the Type-C jack 180 degrees, and reinsert it into the charger firmly.
- If the charger LED is blinking red, try taking your Oura Ring on and off the charger a few times to ensure proper contact between the two.
- Ensure your Oura Ring is running on the most recent firmware version. If an update is pending, you should see a notification at the top of your Home tab of the Oura mobile app.
- Try using a different USB-A to USB-C cable.
- Check if the charging dock is faulty by plugging it into a USB power source without placing the Ring on it. The LED indicator should illuminate white and fade away. Assuming the charger LED lights up, it’s working as intended, and your Ring is at fault here. But if the charging indicator doesn’t light up, the dock is causing the problem.
- If none of the above troubleshooting tips work, it could be a defective battery or charging dock. In this case, you should reach out to Oura support for further assistance.
Conclusion
Oura Ring Charging is a simple process that can help you stay on track with your health and wellness goals.
By following the steps outlined in this article, you’ll be able to keep your ring fully charged and ready to use whenever you need it. If you encounter any issues along the way, don’t hesitate to reach out to Oura support for assistance. Happy charging!